Some weeks ago, I commented on a book I read about the effect the internet has on our minds. While I was reading it, I was very surprised by the negative effect that the Internet has on our concentration capabilities. Since I really like reading books, I could relate to the advantages of regular books over the web. On the other side, I had also experienced difficulties focusing while browsing content online.

I had an idea to overcome some of the distracting effects of the Internet described on the book. One of the reasons why it’s more difficult to concentrate online is because of links. Just try reading an article online, and you’ll be faced with lots of links to related and unrelated material. While many of them are useful, these links occupy our minds in the background. Instead of completly focusing on the topic at hand, part of our brains start thinking about the other links and whether we should access them or not.
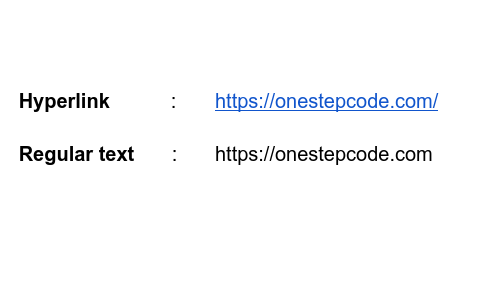
Because of this distractive effect, I thought that it would be helpful to hide links under some circumstances. Like when we want to focus on just a single topic. Link’s formatting is very distinctive, bright colors and underlined text. Erasing this formatting and showing them as “regular text” could help retaining our focus.
Obviously, links are almost inherent to what the Internet is: an interconnected network. So the goal wasn’t really to delete links or disable them, it was just to make them less distracting.
With this idea in mind, I decided to develop a web-browser extension to achieve those goals.
A first dive into JavaScript
I’m really curious about web development but so far I’ve pretty much avoided it. I’m new to programming, so I’d rather focus on one language or as few of them as possible for now. I’ve been learning Python during the last few months and if I was going to learn any web development, I was thinking of Flask or Django.

Full stack Python: One of the pages I wanted to review to learn Python web development
However, the web extension had to be developed in JavaScript so I started learning the basics of it. I did from https://javascript.info/, which I found very good. I read only the first few chapters, primarily to get an idea of JS’s syntax.
For the web-browser, I chose Firefox since I’ve been using it for about a decade now and I really like it.
At the same time, I started browsing a very nice guide from Mozilla meant to teach how to develop extensions. It really provided all the starting information that could be needed as well as some helpful examples. At the very beginning of the guide, they make you develop your own extension, which was simple and motivating.
Iteration and trial and error
The basics of developing a bare-bones extension are very simple. You just need a manifest.json file for the configuration and a single .js script. Once I had this bare-bones structure, I started the development process.
Usually, I prefer advancing in small steps, building complexity progressively with an understanding of what’s going on. But in this case, I had to advance mostly by trial and error as I’m completely new to JS.
Hide formatting
The first step was to change the formatting of web pages. First, I figured out the corresponding CSS rules to hide the link’s formatting. The goal was to make them look as “regular text”.
a,
a:hover,
a:focus,
a:active,
a:visited {
    text-decoration: none !important;
    color: inherit !important;
    background-color: inherit !important;
    border-bottom: initial !important;
}
CSS rules to hide links formatting.
The next step was to dynamically inject these CSS rules. This had to be done via JS:
// Adding a new style tag to the HTML
const styleTag = document.head.appendChild(document.createElement('style'));

// Injecting the CSS rule to the appended style tag
styleTag.textContent = hideLinksStyleText;
The hideLinksStyleText is a string that contains the CSS rules presented above.
After this step was done, the extension effectively hid links! The bad thing was that it did it for all links on all pages. Evidently, this wasn’t really useful. So the next step was to make the extension hide and show links on demand.
Toggling link formatting on/off
This was the trickiest part of the development. I decided to use a toolbar button for the extension that would respond to click events and send a message to activate or deactivate link hiding on the current browser tab.
This process was done primarily by means of Promises. I’m far from an expert to properly explain how they work, but they operate pretty much how its name suggets. It’s like creating functions that send requests and expect an answer, a promise, so that they can perform some action if the promise is fulfilled. This is done so that there’s a communication between the extension button, which is activated after clicking on it, and the current webpage tab, that changes link formatting on demand.
I was amazed by how this worked. I found it a bit complicated, but at the same time, it was quite elegant. Something that really helped me understand it, was the book SICP. In it, they presented the continuation-passing style which I found very similar to how Promises worked. Using these programming techniques, SICP presented programs that would dynamically answer to events. Again, this was very similar to what was going on with promises in JS.
Here’s one portion of how this worked:
browser.browserAction.onClicked.addListener(activeTabLinkToggle);

function activeTabLinkToggle() {
    browser.tabs.query({
        currentWindow: true,
        active: true
    }).then(requestLinkFormatToggle).catch(onError);
}

function requestLinkFormatToggle(tabs) {

    if (tabs && tabs.length) {
        const activeTab = tabs[0];
        browser.tabs.sendMessage(
            activeTab.id, {
                isQuery: false,
                isToggle: true,
            }
        ).then(updateIcon).catch(onError);
    }

}
The first line makes the extension’s button answer to click events. When the button is clicked, it calls the activeTabLinkToggle function. This function gets the current active tab. The results of this query, are passed to the requestLinkFormatToggle function. It communicates with the web page, which is handled by a different script, and modifies the extension’s icon accordingly when it receives an answer.
You can also check the complete source code here.
Conclusion

So that was an overview of how I developed an extension for Firefox. Overall, the experience was very satisfying. It felt very nice to develop your own piece of software that you can plug into your web browser. The credit goes to the developers for making it so simple to create and install your own extension. It was also great to code something that had the effects that I had in mind.
Finally, I’d really encourage people who would like to develop similar things but don’t feel confident or that they know enough to just give it a try.